Creating Shooting Settings Banks Easily and Applying Them on the Camera (Easy Shooting Setup)
By simply selecting the type of subject or scene you want to shoot, you can have the SnapBridge app create the optimal camera settings for the shot. The created settings bank can be sent to and applied on cameras connected with SnapBridge. A list of the cameras that support this feature can be found here.
Creating Camera Settings Banks
Tap [Easy Shooting Setup] in the
 tab.
tab.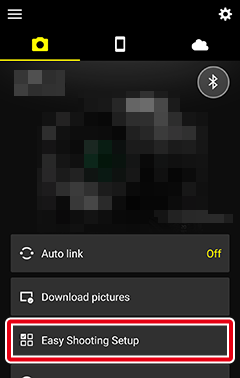
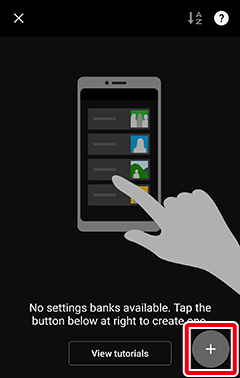
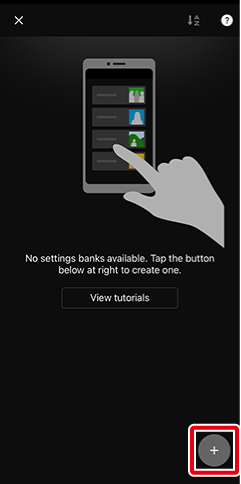
Tap
 .
.
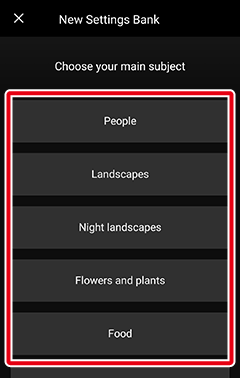
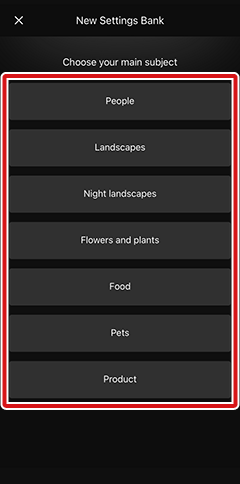
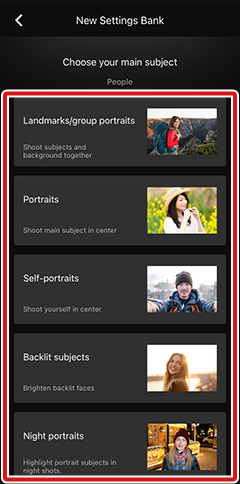
Tap the desired type of subject.
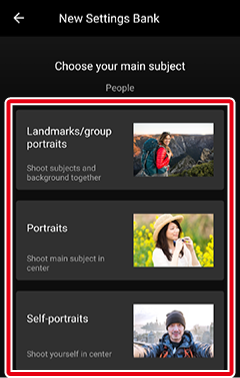
Tap the desired type of scene.
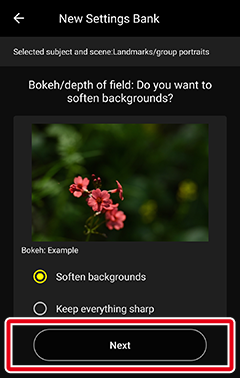
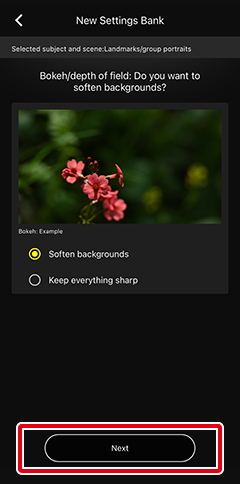
Select an image finish option and tap [Next].
Note that depending on the option selected in Step 4, this step may be skipped, and the screen in Step 6 may be displayed.
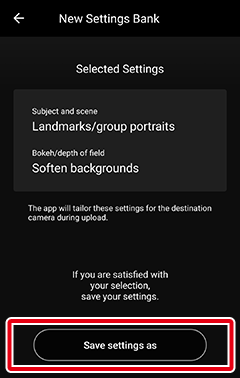
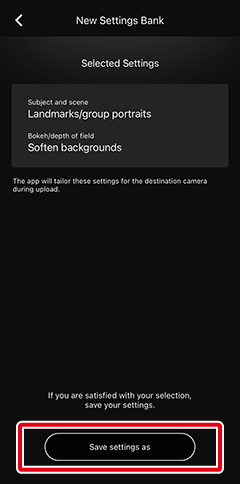
Confirm the adjusted settings in the following screen and tap [Save settings as].
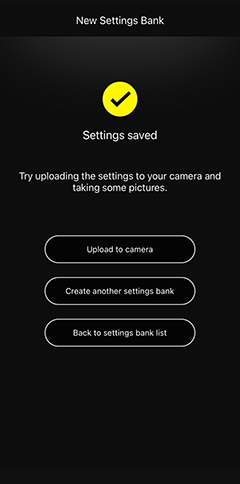
When a camera settings bank has been created, the screen shown in the figure will be displayed.
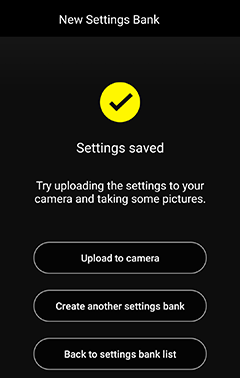
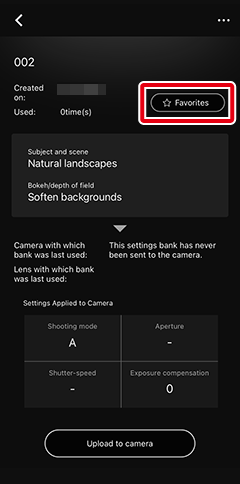
- To send the created settings bank to the camera, tap [Upload to camera].
- To create another settings bank, tap [Create another settings bank].
- To return to the first [Easy Shooting Setup] screen, tap [Back to settings bank list].
Sending and Applying Settings Banks
Before Sending Settings Banks
- Update the firmware of the camera to the latest version in advance.
- This feature is not available in Wi-Fi AP mode or Wi-Fi STA mode. Before using this feature, exit Wi-Fi AP mode or Wi-Fi STA mode and pair the camera and smart device via Bluetooth. See here for details on exiting the Wi-Fi modes.
Tap [Easy Shooting Setup] in the
tab.Note: If you tapped [Upload to camera] in the camera settings creation completion screen, this step is not required. Proceed to Step 4.
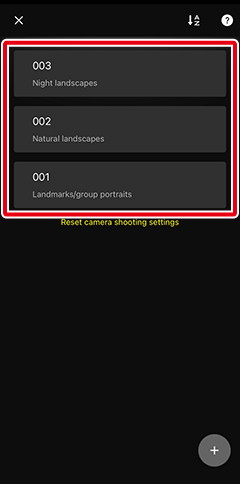
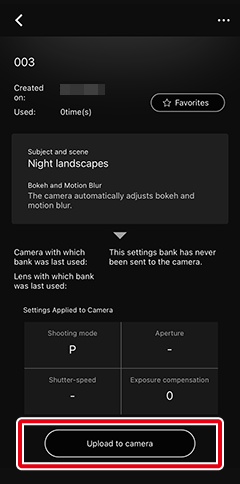
Tap the settings bank you wish to send.
Tap [Upload to camera].

- Camera settings cannot be sent while pictures are being downloaded. Tap this option after pictures have completed downloading.
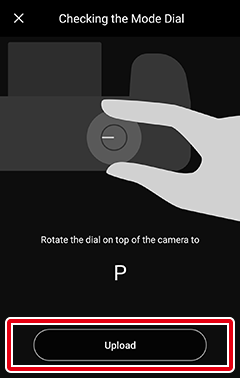
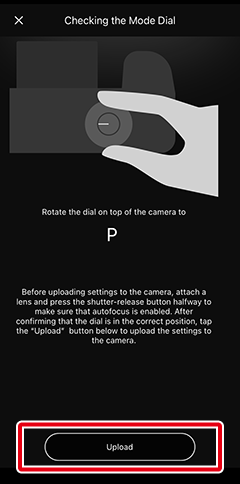
- When the instructions on camera operations are displayed, turn the camera on and operate the camera according to the on-screen instructions.
After completing camera operations, tap [Upload].
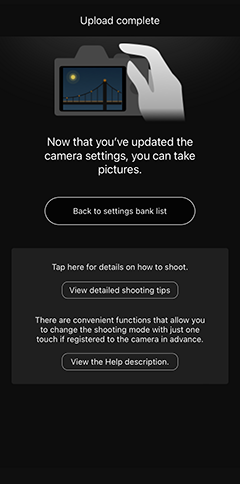
When the camera settings bank has been sent, the screen shown in the figure will be displayed, and the settings will be applied on the camera.
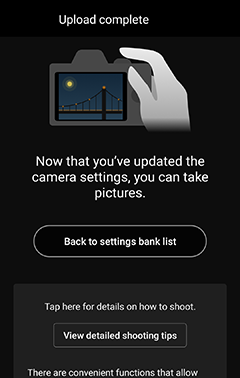
- To return to the first [Easy Shooting Setup] screen, tap [Back to settings bank list].
- Tap [View detailed shooting tips] to view useful tips according to the subject and scene.
Can’t Send Settings Banks to the Camera?
See here if you cannot send settings banks to your camera.
Editing/Deleting Settings Banks
Renaming Camera Settings Banks
Tap [Easy Shooting Setup] in the
tab.Tap the settings bank you wish to rename.
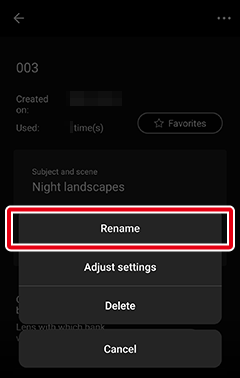
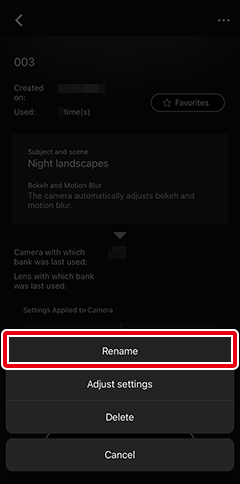
Tap the
 button and select [Rename].
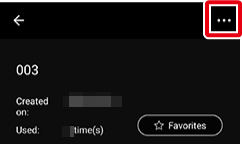
- Enter the name as desired.
Editing Camera Settings Banks
Tap [Easy Shooting Setup] in the
tab.Tap the settings bank you wish to edit.
Tap the
button and select [Adjust settings].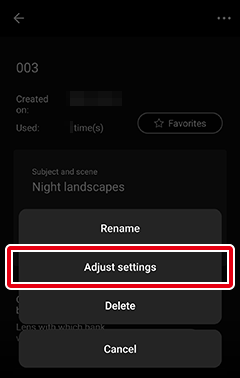
Tap the desired type of subject.
Tap the desired type of scene.
Select an image finish option and tap [Next].
Note that depending on the option selected in Step 5, this step may be skipped, and the screen in Step 7 may be displayed.
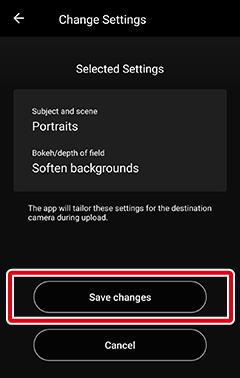
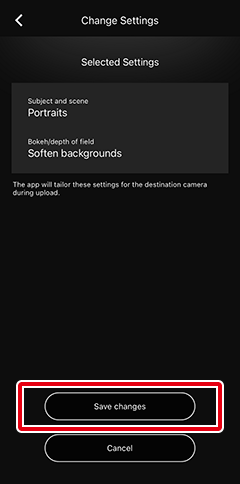
Confirm the adjusted settings in the following screen and tap [Save changes].
Adding Frequently Used Camera Settings to Favorites
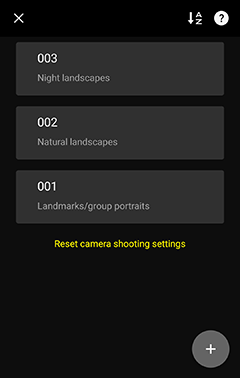
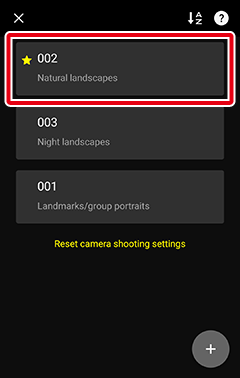
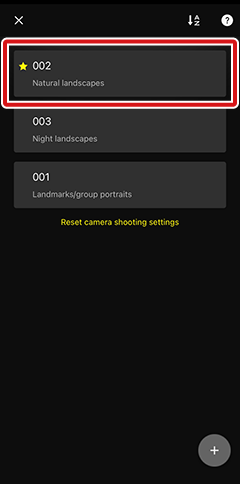
Camera settings banks that have been added to favorites are displayed at the top of the list.
Tap [Easy Shooting Setup] in the
tab.Tap the settings bank you wish to display at the top.
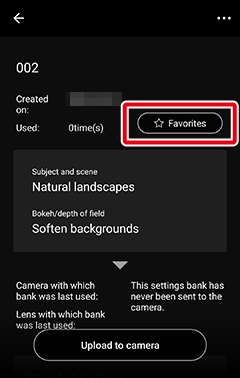
Tap [Favorites] to display the selected settings bank at the top of the camera settings list.
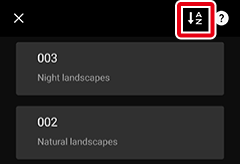
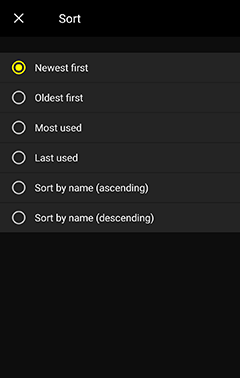
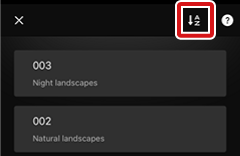
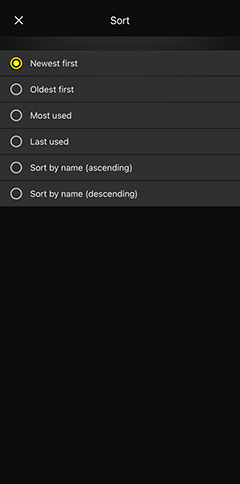
Multiple settings banks added to favorites will be displayed in the order set using the
 button.
Deleting Camera Settings Banks
Tap [Easy Shooting Setup] in the
tab.Tap the settings bank you wish to delete.
Tap the
button and select [Delete].
- Settings banks can also be deleted by swiping them to the left in Step 2.
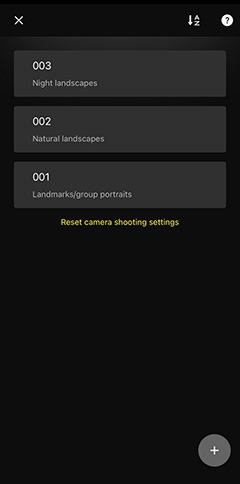
Resetting Camera Settings Configured Through Easy Shooting Setup
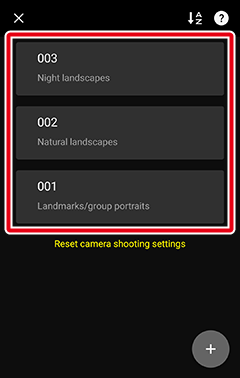
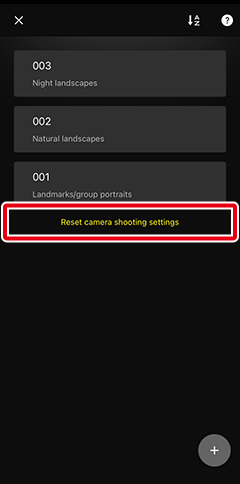
Tap [Easy Shooting Setup] in the
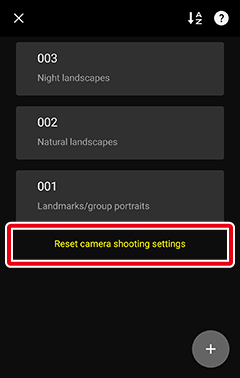
tab.Tap [Reset camera shooting settings].
- This option is not displayed if no camera settings banks have been created.
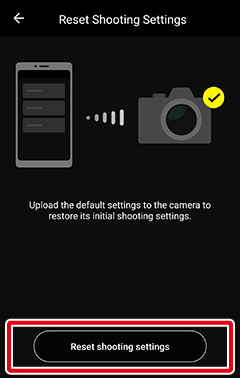
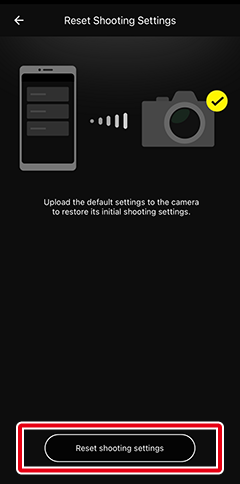
Tap [Reset shooting settings] in the displayed screen.
Follow the camera operation instructions displayed in the next screen, then return to the SnapBridge app and tap [Upload].
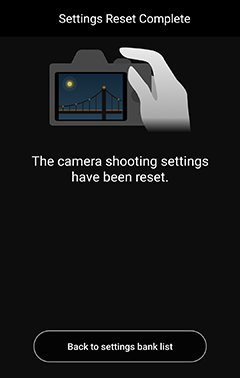
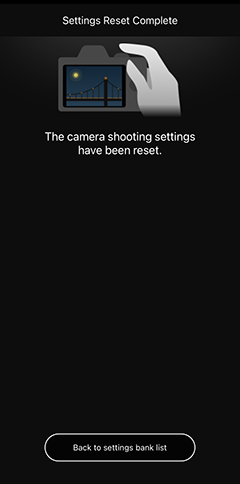
When the camera settings have been reset, the screen shown in the figure will be displayed.
Camera settings that were configured through Easy Shooting Setup will be reset. Camera settings that cannot be configured through Easy Shooting Setup will not be reset.
Can’t Reset Camera Settings?
See here if you cannot reset camera shooting settings from SnapBridge.
Creating Camera Settings Banks
Tap [Easy Shooting Setup] in the
tab.
Tap
.
Tap the desired type of subject.
Tap the desired type of scene.
Select an image finish option and tap [Next].
Note that depending on the option selected in Step 4, this step may be skipped, and the screen in Step 6 may be displayed.
Confirm the adjusted settings in the following screen and tap [Save settings as].
When a camera settings bank has been created, the screen shown in the figure will be displayed.
- To send the created settings bank to the camera, tap [Upload to camera].
- To create another settings bank, tap [Create another settings bank].
- To return to the first [Easy Shooting Setup] screen, tap [Back to settings bank list].
Sending and Applying Settings Banks
Before Sending Settings Banks
- Update the firmware of the camera to the latest version in advance.
- This feature is not available in Wi-Fi AP mode or Wi-Fi STA mode. Before using this feature, exit Wi-Fi AP mode or Wi-Fi STA mode and pair the camera and smart device via Bluetooth. See here for details on exiting the Wi-Fi modes.
Tap [Easy Shooting Setup] in the
tab.Note: If you tapped [Upload to camera] in the camera settings creation completion screen, this step is not required. Proceed to Step 4.
Tap the settings bank you wish to send.
Tap [Upload to camera].
- Camera settings cannot be sent while pictures are being downloaded. Tap this option after pictures have completed downloading.
- When the instructions on camera operations are displayed, turn the camera on and operate the camera according to the on-screen instructions.
After completing camera operations, tap [Upload].
When the camera settings bank has been sent, the screen shown in the figure will be displayed, and the settings will be applied on the camera.
- To return to the first [Easy Shooting Setup] screen, tap [Back to settings bank list].
- Tap [View detailed shooting tips] to view useful tips according to the subject and scene.
Can’t Send Settings Banks to the Camera?
See here if you cannot send settings banks to your camera.
Editing/Deleting Settings Banks
Renaming Camera Settings Banks
Tap [Easy Shooting Setup] in the
tab.Tap the settings bank you wish to rename.
Tap the
button and select [Rename].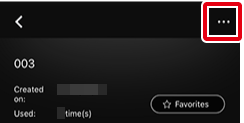
- Enter the name as desired.
Editing Camera Settings Banks
Tap [Easy Shooting Setup] in the
tab.Tap the settings bank you wish to edit.
Tap the
button and select [Adjust settings].
Tap the desired type of subject.
Tap the desired type of scene.
Select an image finish option and tap [Next].
Note that depending on the option selected in Step 5, this step may be skipped, and the screen in Step 7 may be displayed.
Confirm the adjusted settings in the following screen and tap [Save changes].
Adding Frequently Used Camera Settings to Favorites
Camera settings banks that have been added to favorites are displayed at the top of the list.
Tap [Easy Shooting Setup] in the
tab.Tap the settings bank you wish to display at the top.
Tap [Favorites] to display the selected settings bank at the top of the camera settings list.
Multiple settings banks added to favorites will be displayed in the order set using the
button.
Deleting Camera Settings Banks
Tap [Easy Shooting Setup] in the
tab.Tap the settings bank you wish to delete.
Tap the
button and select [Delete].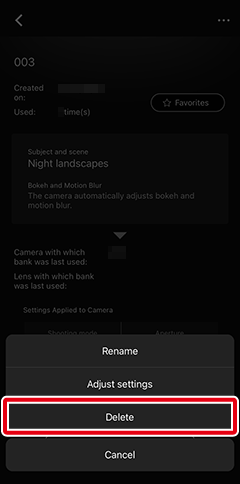
- Settings banks can also be deleted by swiping them to the left in Step 2.
Resetting Camera Settings Configured Through Easy Shooting Setup
Tap [Easy Shooting Setup] in the
tab.Tap [Reset camera shooting settings].
- This option is not displayed if no camera settings banks have been created.
Tap [Reset shooting settings] in the displayed screen.
Follow the camera operation instructions displayed in the next screen, then return to the SnapBridge app and tap [Upload].
When the camera settings have been reset, the screen shown in the figure will be displayed.
Camera settings that were configured through Easy Shooting Setup will be reset. Camera settings that cannot be configured through Easy Shooting Setup will not be reset.
Can’t Reset Camera Settings?
See here if you cannot reset camera shooting settings from SnapBridge.