- Android
- iOS
Remote Video Recording with Live View
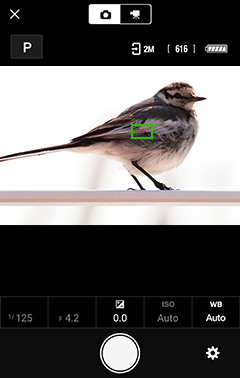
To record videos remotely from a smart device via a Wi-Fi connection, turn the camera on and tap Remote photography in the  tab (see here for cameras that support this feature).
Remote Recording
Before beginning remote video recording, mount the camera on a tripod or place it on stable, level surface. If you are using a digital SLR camera, note that tapping Remote photography in the SnapBridge app will not display the remote photography dialog if live view is currently active on the camera. Exit live view before proceeding.
Wi‑Fi
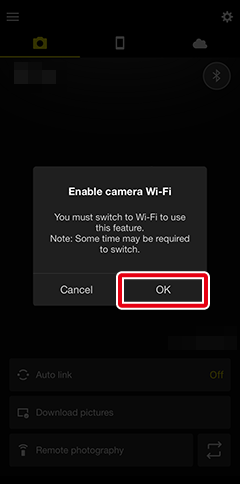
If you are unable to connect via Wi-Fi, check here before tapping Remote photography again. Note that a Wi-Fi connection cannot be established while the camera is off; be sure to turn the camera on before proceeding. In addition, note that the following are unavailable when the camera and smart device are connected via Wi-Fi:
- Features accessed via Auto link in the tab (auto download, clock synchronization and location data)
- The Create a Nikon ID account option in the
 tab
tab - The Nickname option in the SnapBridge menu
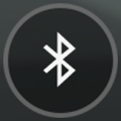
- Bluetooth remote control
To use these features, terminate the Wi-Fi connection. If you connected in Wi-Fi mode, exit Wi‑Fi mode and pair the camera and smart device via Bluetooth.
Recording Videos
-
The procedure differs depending on whether the camera is currently connected via Wi-Fi or Bluetooth.
Wi-Fi mode: Tap Remote photography in the
tab. SnapBridge will display the view through the camera lens; proceed to Step 3.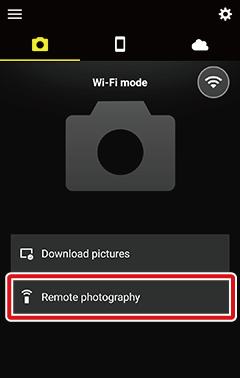
Bluetooth connection (indicated by a
 icon): Tap Remote photography in the tab and proceed to the next step.
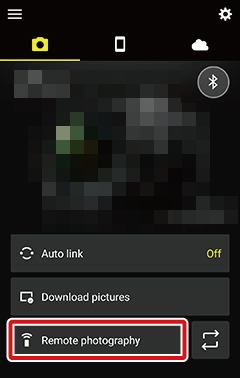
-
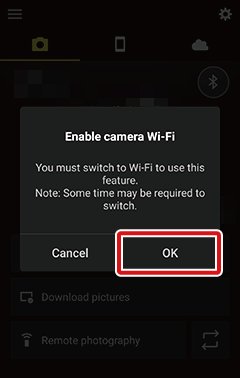
If you are prompted to switch to Wi-Fi, tap OK to connect. Shooting controls will be displayed once a Wi-Fi connection has been established.
-
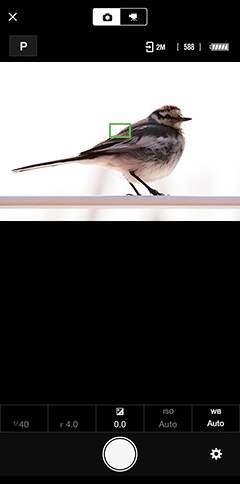
Tap
 to select video mode.
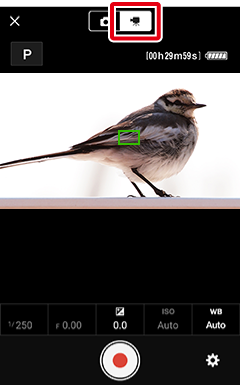
-
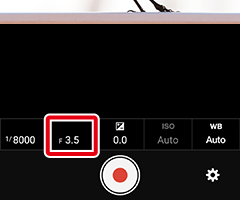
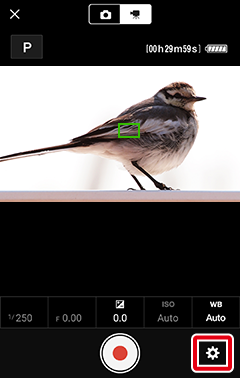
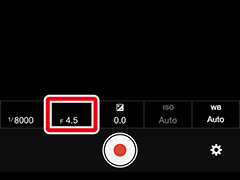
To choose the exposure mode (P or M) and adjust shutter speed, aperture, exposure compensation, ISO sensitivity, and white balance, tap the desired control and choose a setting.
Note: Some options may not be available depending on the camera or on camera settings.
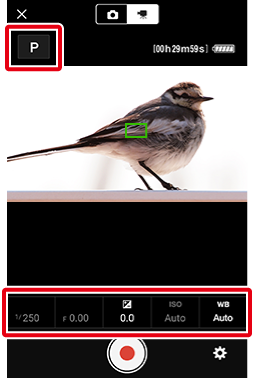
Adjusting Settings
Shooting settings can be adjusted as follows:
-
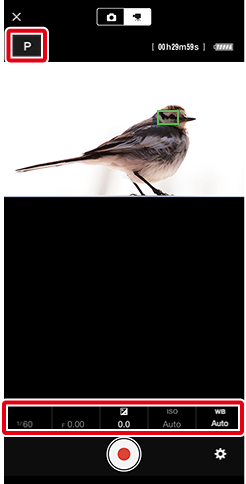
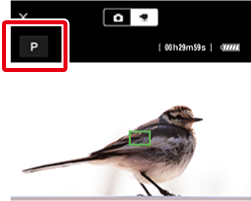
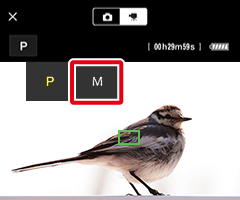
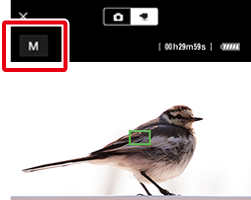
To choose an exposure mode, tap the mode icon…
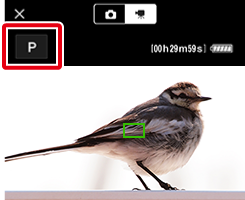
…and tap the desired mode.
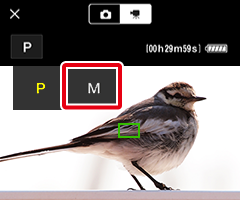
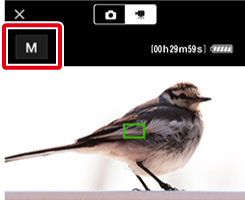
The selected mode will be displayed.
-
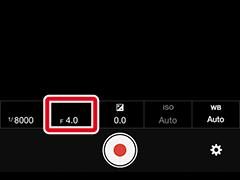
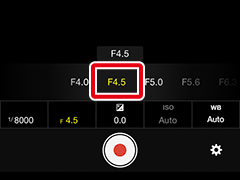
To adjust other settings, tap the setting icon.
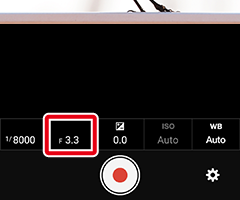
A list of available settings will be displayed; tap the desired item or swipe left or right to view other options.
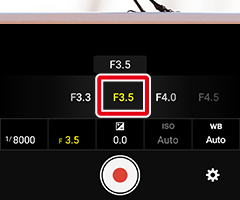
The selected option will be displayed.
-
-
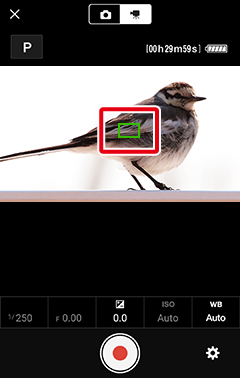
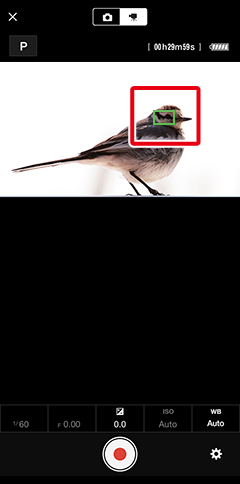
Focus.
Tap anywhere in the frame to focus on the selected location.
-
Tap the record button to start recording. While recording is in progress, the button changes to
 ; tap again to end recording.
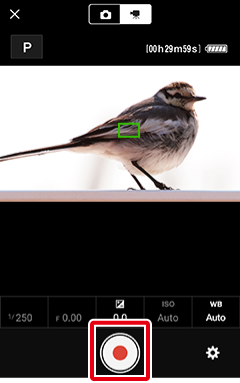
-
Tap
 to return to the tab when shooting is complete.
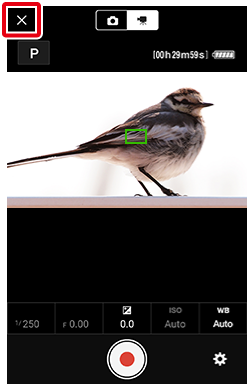
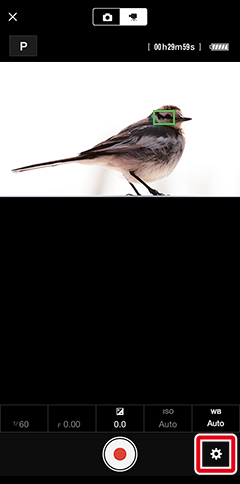
The Remote Recording Menu
To view the remote recording menu, tap the  button.
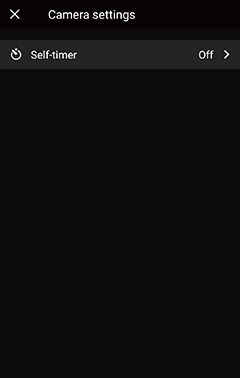
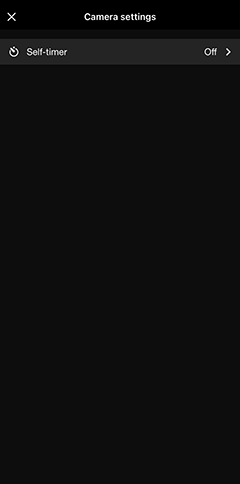
- Self-timer
- Turn this option on (
 ) to record videos with the self-timer. The delay before the recording begins can be chosen from 3, 5, and 10 seconds. Tap again to turn the timer off (
 ).
).
Remote Recording
Before beginning remote video recording, mount the camera on a tripod or place it on stable, level surface. If you are using a digital SLR camera, note that tapping Remote photography in the SnapBridge app will not display the remote photography dialog if live view is currently active on the camera. Exit live view before proceeding.
Wi‑Fi
If you are unable to connect via Wi-Fi, check here before tapping Remote photography again. Note that a Wi-Fi connection cannot be established while the camera is off; be sure to turn the camera on before proceeding. In addition, note that the following are unavailable when the camera and smart device are connected via Wi-Fi:
- Features accessed via Auto link in the tab (auto download, clock synchronization and location data)
- The Create a Nikon ID account option in the tab
- The Nickname option in the SnapBridge menu
- Bluetooth remote control
To use these features, terminate the Wi-Fi connection. If you connected in Wi-Fi mode, exit Wi‑Fi mode and pair the camera and smart device via Bluetooth.
Recording Videos
-
The procedure differs depending on whether the camera is currently connected via Wi-Fi or Bluetooth.
Wi-Fi mode: Tap Remote photography in the
tab. SnapBridge will display the view through the camera lens; proceed to Step 3.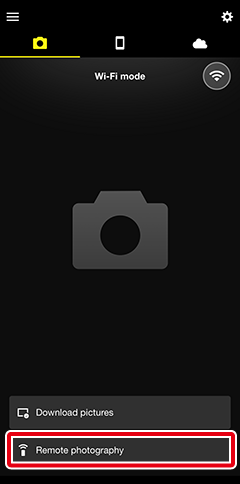
Bluetooth connection (indicated by a
icon): Tap Remote photography in the tab and proceed to the next step.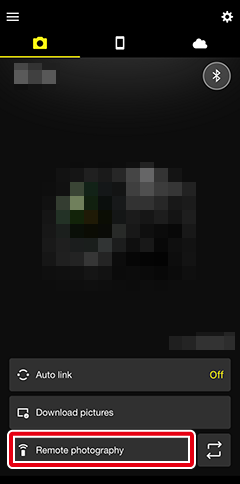
-
If you are prompted to switch to Wi-Fi, switch to Wi-Fi as described here. Shooting controls will be displayed once a Wi-Fi connection has been established.
-
Tap
to select video mode.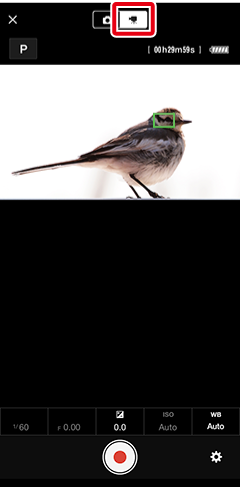
-
To choose the exposure mode (P or M) and adjust shutter speed, aperture, exposure compensation, ISO sensitivity, and white balance, tap the desired control and choose a setting.
Note: Some options may not be available depending on the camera or on camera settings.
Adjusting Settings
Shooting settings can be adjusted as follows:
-
To choose an exposure mode, tap the mode icon…
…and tap the desired mode.
The selected mode will be displayed.
-
To adjust other settings, tap the setting icon.
A list of available settings will be displayed; tap the desired item or swipe left or right to view other options.
The selected option will be displayed.
-
-
Focus.
Tap anywhere in the frame to focus on the selected location.
-
Tap the record button to start recording. While recording is in progress, the button changes to
; tap again to end recording.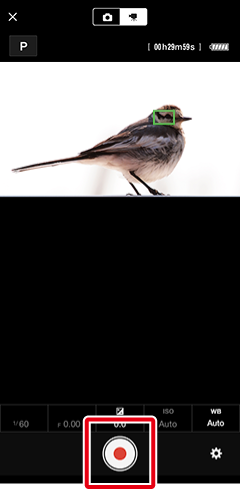
-
Tap
to return to the tab when shooting is complete.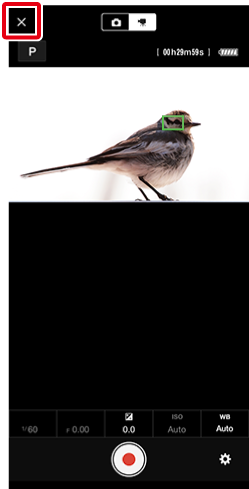
The Remote Recording Menu
To view the remote recording menu, tap the button.
- Self-timer
- Turn this option on (
 ) to record videos with the self-timer. The delay before the recording begins can be chosen from 3, 5, and 10 seconds. Tap again to turn the timer off (
 ).
).